Have you ever stared at a geometry problem filled with circles, lines, and angles, feeling completely lost? You might remember your teacher mentioning things like "tangents" or "inscribed angles," but when you look at the diagram, your mind goes blank. It's a frustrating feeling, and it's the single biggest hurdle for students learning circle theorems: you can memorize the names, but you struggle to see how they work and which one to use.
This guide is here to change that. We're going to transform these confusing rules into visual, easy-to-understand tools you can use with confidence. Think of circle theorems not as abstract laws to memorize, but as the secret rules of a puzzle. Once you see them, you can't unsee them, and solving circle problems becomes a satisfying challenge instead of a source of stress.
We'll walk through each key theorem with clear diagrams, step-by-step examples, and common mistakes to avoid. And when you're doing homework late at night and get stuck, remember that tools like Tutor AI are designed to help you break down the problem. With a quick photo, you get step-by-step explanations that show you which theorem to use and why, helping you learn the process, not just get the answer. If you find AI tools helpful, you might want to explore The Ultimate Guide to AI Math Solvers.
What Are Circle Theorems (and Why Do They Matter)?
Circle theorems are a set of rules in geometry that describe the relationships between angles, lines, and arcs within and around a circle. They are fundamental truths that are always valid, no matter the size of the circle.
But why do they matter? Beyond being a key part of your geometry curriculum, these theorems have powerful real-world applications. They are used in fields like architecture to design domes and arches, in astronomy to calculate planetary orbits, and in computer graphics to create realistic animations. Understanding them is a great first step to mastering complex problem-solving, a skill useful in any career.
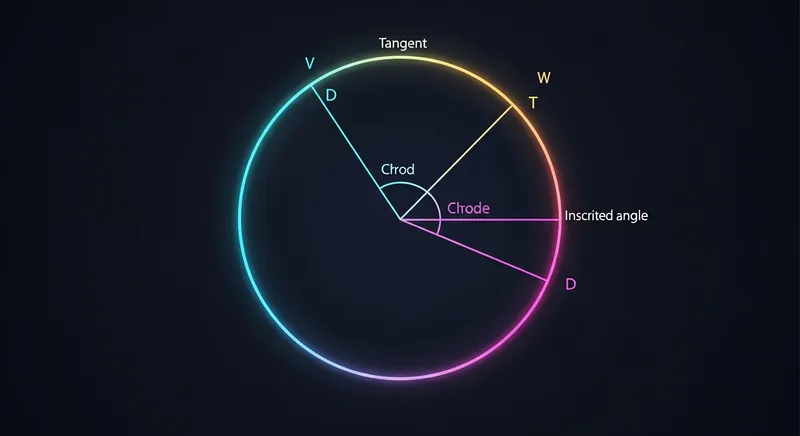
The Building Blocks: Key Circle Terminology
Before we dive into the theorems, we need to speak the same language. Here are the essential parts of a circle you must know. Many of these have precise mathematical definitions, like the ones provided by the respected online math encyclopedia, Wolfram MathWorld.
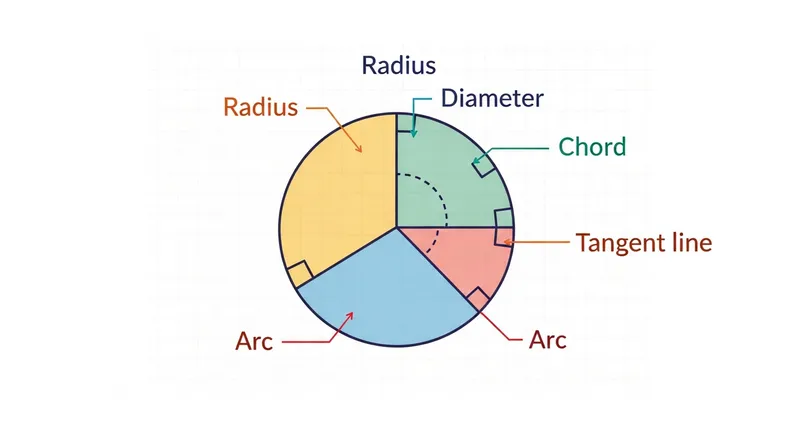
- Radius: The distance from the center of the circle to any point on its edge.
- Diameter: A straight line passing through the center of the circle, connecting two points on the edge. It's always twice the length of the radius.
- Chord: A straight line that connects two points on the edge of a circle. The diameter is the longest possible chord.
- Tangent: A straight line that touches the circle at exactly one point, called the point of tangency.
- Secant: A line that passes through a circle, intersecting it at two points.
- Arc: A portion of the circumference (the edge) of the circle.
- Circumference: The total distance around the outside of the circle, calculated with the formula C = 2πr, as explained by educational platforms.
Actionable Tip: Draw your own circle and label these parts without looking. This simple act of recall will help cement the terms in your memory.
The 7 Core Circle Theorems Explained
Ready for the main event? We'll cover the seven main circle theorems you need to know. For each one, we'll give you the rule, a visual breakdown, a worked example, and the most common pitfall to avoid.
1. The Angle at the Center Theorem
- Simple Explanation: An angle at the center of a circle is twice as big as an angle at the edge, as long as they both use the same starting and ending points on the circle's edge.
- The Rule (Formal): The angle at the centre of a circle is twice the angle at the circumference when subtended by the same arc.
- Visual Breakdown: Imagine two points on the circle's edge. Draw lines from these points to the center (the central angle). Then, draw lines from those same two points to any other spot on the circumference (the inscribed angle). The central angle will always be double the inscribed angle.
- Step-by-Step Example:
- Problem: If the inscribed angle on the circumference is 40°, what is the central angle subtended by the same arc?
- Solution: The central angle is twice the inscribed angle. So, you calculate: 40° * 2 = 80°. The central angle is 80°.
- Common Mistake: Applying the rule when the angles don't start and end at the same points on the arc. Always trace the lines with your finger to make sure they share the same arc.
2. Angles in the Same Segment Theorem
- Simple Explanation: Angles that are formed from the same two points on the edge of the circle and meet at any other point on the circumference are equal.
- The Rule (Formal): Angles in the same segment of a circle are equal.
- Visual Breakdown: Pick two points on the circle's edge. Now, pick a third point anywhere on the major arc and form a triangle. The angle at that third point will be the same no matter where you move it along the arc.
- Step-by-Step Example:
- Problem: Points A and B are on a circle. Points C and D are also on the circle, in the same segment. If angle ACB is 35°, what is angle ADB?
- Solution: Since both angles are in the same segment and subtended by the same arc (AB), they must be equal. Therefore, angle ADB = 35°.
- Common Mistake: Assuming angles are equal just because they look similar. You must confirm they originate from the exact same two points on the circumference.
3. The Angle in a Semicircle Theorem
- Simple Explanation: If you draw a triangle using the circle's diameter as one side, the angle you make on the circle's edge will always be a right angle (90°).
- The Rule (Formal): An angle inscribed across a circle's diameter is always a right angle.
- Visual Breakdown: Draw a diameter. Pick any point on the circumference. Draw lines from the ends of the diameter to that point. The angle formed at that point will be exactly 90°.
- Step-by-Step Example:
- Problem: In a circle, triangle ABC is formed where AB is the diameter. What is the measure of angle C on the circumference?
- Solution: Since AB is the diameter, angle C must be a right angle. Therefore, angle C = 90°.
- Common Mistake: Assuming any triangle inside a circle has a 90° angle. This rule only works if one of the triangle's sides is the diameter of the circle.
4. Cyclic Quadrilateral Theorem
- Simple Explanation: For any four-sided shape that has all its corners touching the circle's edge, opposite angles add up to 180°.
- The Rule (Formal): The opposite angles of a cyclic quadrilateral sum to 180°.
- Visual Breakdown: Draw a quadrilateral where all four vertices are on the circumference. Take any two angles that are opposite each other. Their sum will always be 180°.
- Step-by-Step Example:
- Problem: A cyclic quadrilateral ABCD has angle A = 80°. What is the measure of the opposite angle, angle C?
- Solution: The opposite angles must add up to 180°. So, you calculate: 180° - 80° = 100°. Angle C = 100°.
- Common Mistake: Applying this rule to a quadrilateral where one or more vertices are not on the circle's circumference.
5. The Tangent and Radius Theorem
- Simple Explanation: A radius and a tangent are always perpendicular (form a 90° angle) at the point where they meet.
- The Rule (Formal): As shown in examples by Khan Academy, a radius drawn to the point of tangency is perpendicular to the tangent line.
- Visual Breakdown: Find the spot where a tangent line touches the circle. Draw a radius from the center to this exact spot. The angle between the radius and the tangent will always be 90°.
- Step-by-Step Example:
- Problem: A tangent line touches a circle with a radius of 5 cm. A line is drawn from the center to a point on the tangent 12 cm away from the point of tangency. What is the distance from the center to this point?
- Solution: The radius and tangent form a right-angled triangle. Use the Pythagorean theorem (a² + b² = c²): 5² + 12² = c². This gives 25 + 144 = c², so c² = 169. The distance (c) is 13 cm.
- Common Mistake: Forgetting that this creates a right-angled triangle, which is the key to solving many problems involving tangents. If you feel overwhelmed by homework, remembering this simple 90° rule can be a huge help.
6. Two Tangents from a Point Theorem
- Simple Explanation: If you draw two tangent lines to a circle from the same single point outside the circle, the lengths of the tangents from that point to where they touch the circle are equal.
- The Rule (Formal): The lengths of two tangents drawn from an external point to a circle are equal.
- Visual Breakdown: Pick a point outside the circle. Draw two separate lines from this point that each touch the circle at only one spot. The distance from the external point to each point of tangency will be identical.
- Step-by-Step Example:
- Problem: A point P is outside a circle. Tangents from P touch the circle at points A and B. If the length of PA is 10 cm, what is the length of PB?
- Solution: According to the theorem, the two tangents from point P must be equal in length. Therefore, PB = 10 cm.
- Common Mistake: Confusing the length of the tangent with the length of a secant line that goes through the circle.
7. The Alternate Segment Theorem
- Simple Explanation: The angle between a tangent and a chord is equal to the angle in the opposite (alternate) segment of the circle.
- The Rule (Formal): The learning platform Brilliant.org explains that the angle formed by a tangent and a chord through the point of contact is equal to the angle subtended by the chord in the alternate segment.
- Visual Breakdown: This is the toughest one to see! At the point of tangency, find the angle made by the tangent and a chord. Now, follow the chord to the two points it hits on the circle. Use those two points to form a triangle with any other point in the major arc. The angle of that triangle's peak is the same as the angle you started with.
- Step-by-Step Example:
- Problem: A tangent touches a circle at point A. A chord AC is drawn. The angle between the tangent and chord AC is 65°. Point B is on the major arc of the circle. What is the angle ABC?
- Solution: According to the Alternate Segment Theorem, the angle in the alternate segment (angle ABC) is equal to the angle between the tangent and the chord. So, angle ABC = 65°.
- Common Mistake: Mixing up which angle corresponds to which segment. Always trace the chord to the alternate segment to find the matching angle.
Putting It All Together: A Problem-Solving Strategy
In exams, you'll rarely get a problem that uses just one theorem. The real skill is learning to see which combination of theorems to apply. Here's a thought process to follow:
- Scan for Keywords & Features: Look for the obvious clues. Is there a tangent? Think "Tangent-Radius (90°)" and "Alternate Segment." Is there a diameter? Think "Angle in a Semicircle (90°)." Is there a cyclic quadrilateral? Think "Opposite angles add to 180°."
- Trace the Angles: Look at the angle you're given and the one you need to find. Do they share an arc? Think "Angle at the Center" or "Angles in the Same Segment."
- Add Helper Lines: Don't be afraid to draw in a radius or a chord. Sometimes adding one line is all it takes to reveal a right-angled triangle or a familiar shape.
This is where an AI-powered tool can be invaluable. When you're stuck, you can use Tutor AI to snap a picture of the problem. Its step-by-step solutions don't just give the answer; they show you which theorems were used and why, helping you train your brain to see these patterns on your own. This is a key difference from tools that just give answers, an important consideration when comparing options like Photomath vs. Chegg.
A Note for Parents: Building Independent Learners
It's natural to worry that a homework tool might just provide a shortcut. However, the right tool can build confidence and independence. When your child uses Tutor AI, they aren't just getting an answer. They are receiving a guided explanation that mimics a one-on-one tutoring session. You can even use the progress tracking feature to see which concepts they're struggling with, helping you have more focused conversations about their learning and celebrate their improvement over time.
For the Ambitious Learner: How to Prove Circle Theorems
If you want to achieve a top grade in a course like HSC Maths Advanced, you can't just know the theorems; you need to understand why they're true. Proving theorems deepens your understanding.
Let's briefly look at how to prove the Alternate Segment Theorem, for which Brilliant.org provides a great explanation. A common method involves:
- Drawing the diameter from the point of tangency to create a triangle.
- Using the Angle in a Semicircle Theorem to identify a 90° angle in that triangle.
- Using the Tangent and Radius Theorem to identify the 90° angle between the tangent and the diameter.
- Through simple angle subtraction and using the properties of angles in a triangle, you can show that the required angles are equal.
Actionable Tip: Challenge yourself to write out the proof for one of the simpler theorems, like the Angle in a Semicircle theorem. This will boost your confidence and mathematical reasoning skills.
Your Ultimate Circle Theorems Study Kit
To truly conquer circle theorems, you need a system. Create a personal study kit to actively engage with the material, a strategy we also recommend to ace your science test.
1. Create Your Theorem Cheat Sheet Copy this list or write it on a flashcard. Having a quick-reference guide is essential.
- Angle at Center: Double the angle at the edge.
- Angles in Same Segment: Are equal.
- Angle in Semicircle: Is always 90°.
- Cyclic Quad: Opposite angles add to 180°.
- Tangent & Radius: Meet at 90°.
- Two Tangents from Point: Are equal in length.
- Alternate Segment: Angle between tangent/chord equals angle in alternate segment.
2. Build a 'Common Mistakes' List Every time you make a mistake on a practice problem, add it to this list. Reviewing what not to do is as important as reviewing what to do.
3. Use Digital Tools for Practice Don't just stick to your textbook. Use apps like Tutor AI to find practice problems and get instant, step-by-step feedback. This helps you identify which theorems are your weak spots so you can focus your efforts.
Conclusion: From Confused to Confident
Circle theorems don't have to be a source of frustration. By shifting your focus from memorization to visualization, you can learn to see the patterns and apply the rules with confidence. Remember to start with the basics, trace the lines, and always ask yourself, "What do I see?" A tangent? A diameter? A cyclic quadrilateral?
Practice is the key to making these theorems second nature. The more problems you work through, the faster you'll become at identifying the right tools for the job. For those moments when you're truly stuck, don't just give up. Take a snapshot and let Tutor AI guide you through the solution, turning every problem into a learning opportunity.
Ready to put your knowledge to the test? Download Tutor AI and solve your first problem tonight!
Frequently Asked Questions
How do I know which circle theorem to use on a problem?
This is the most common challenge! Here's a quick diagnostic process:
- Scan for Key Features: Look for obvious clues in the diagram. Do you see a tangent line? A diameter? A quadrilateral with all its corners on the circle? These features point directly to specific theorems.
- Identify the Angles: Where are the angles located? If one is at the center and another is at the edge, think about the 'Angle at the Center' theorem. If all angles are on the circumference, consider 'Angles in the Same Segment' or 'Cyclic Quadrilateral'.
- Trace the Lines: Use your finger or pencil to trace the lines that form the angles and arcs. This helps you visually confirm if angles share the same arc, which is a condition for several theorems.
- Look for Hidden Shapes: Sometimes you need to add a line (like a radius) to the diagram to create a right-angled triangle using the Tangent-Radius theorem. Don't be afraid to augment the diagram to reveal the solution.
What is a cyclic quadrilateral?
A cyclic quadrilateral is a four-sided shape where all four of its vertices (corners) lie on the circumference of a single circle. Its most important property is that the opposite angles always add up to 180°. For example, if you have a cyclic quadrilateral ABCD, then Angle A + Angle C = 180° and Angle B + Angle D = 180°.
What is the relationship between a tangent and a radius?
The relationship is simple but powerful: a radius and a tangent are always perpendicular to each other at the point of tangency. This means they form a 90° angle. This rule is incredibly useful because it allows you to create right-angled triangles in your diagrams, which opens the door to using other tools like the Pythagorean theorem or trigonometry to find unknown lengths and angles.
What is the difference between a central angle and an inscribed angle?
A central angle has its vertex (the point of the angle) at the center of the circle. An inscribed angle has its vertex on the circumference of the circle. If they both use the same arc, the central angle is always twice the inscribed angle.